
How to build a timber paling fence: Timber paling fence installation guide
How to Install a Timber Paling Fence
Installing a timber paling fence is a quintessential DIY project for many homeowners in Australia. Whether you’re looking to enhance your property’s privacy, secure your boundaries, or add a touch of rustic charm to your landscape, a timber paling fence can be the perfect solution. In this comprehensive guide, we’ll take you through the entire fence installation process step by step. We’ve covered everything, from setting the posts to attaching the palings. So, roll up your sleeves, grab your tools, and dive into the world of timber paling fences.
Introduction
Timber paling fences have long been a popular choice in Australia. They offer a classic, timeless look while providing practical benefits like privacy and security. Before we get into the nitty-gritty of installation, let’s start with some basics.
What is a Timber Paling Fence?
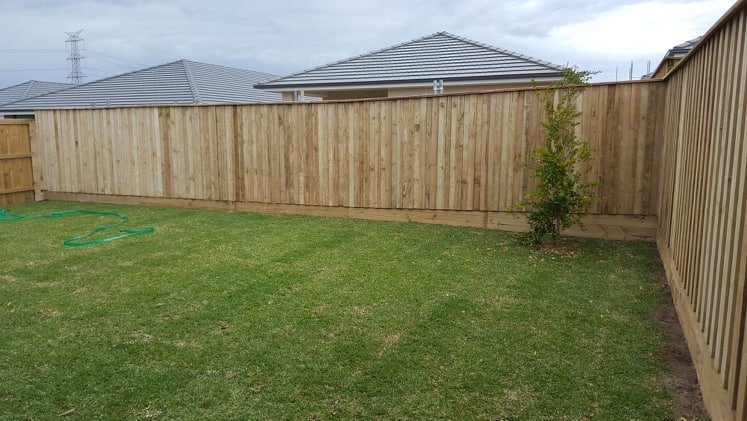
A timber paling fence, often simply referred to as a paling fence, is a type of fence made from horizontal timber boards, known as palings, attached to vertical timber posts. These fences are commonly used for residential properties, serving as boundary markers and providing enclosure.
Getting Started
Before you can build your dream paling fence, there are a few essential steps to prepare and plan the project. Let’s begin with the basics.
1. Gather Your Tools and Materials
Fence installation, like any DIY project, requires the right tools and materials. Here’s a list of what you’ll need:
| Tools | Materials |
|---|---|
| – Post hole digger | – Timber palings |
| – Spirit level | – Fence posts |
| – Claw hammer | – Concrete mix |
| – Nails | – Gravel |
| – Saw | – Galvanized screws |
| – String line | – Post caps |
| – Tape measure | – Plinth boards |
| – Safety gear | – Treated pine rails |
2. Obtain Necessary Permits and Permissions
Before digging post holes and hammering nails, check with your local authorities and neighbours regarding any necessary permits or permissions. It’s crucial to ensure that your fence complies with local regulations and doesn’t encroach on your neighbour’s property.
3. Calculate Your Fence Quote
Determine the fence length you’ll need and calculate the required materials. This step is vital for budgeting and ensuring you purchase the right timber, nails, and other essentials. You can get a fence quote from a local supplier for accurate pricing.
Setting the Stage
Now that you’ve gathered your tools, checked the regulations, and calculated your fence quote, it’s time to move on to the next fence installation steps.
4. Mark the Fence Line
Using string lines and pegs, mark the exact line where your fence will stand. Ensure it follows the property boundary and is a straight line. This initial step is crucial for maintaining a neat appearance.
5. Dig the Post Holes
Use the post hole digger to create holes for your fence posts. These holes should be deep enough to provide stability, typically around 600mm deep for standard timber posts. Place the holes at even intervals along the fence line.
6. Set the Fence Posts
Now, it’s time to place your timber fence posts into the holes. Make sure they are level and plumb using a spirit level. Fill the holes with a concrete mix to secure the posts in place. Allow the concrete to set before proceeding.
Building the Frame
With the fence posts securely in place, it’s time to start building the framework of your timber paling fence.
7. Attach the Rails
Attach treated pine rails horizontally between the posts. These rails serve as the framework to which you’ll later attach the palings. Use galvanized screws to ensure durability and resistance to rust.
8. Add Plinth Boards
Add plinth boards at the bottom to enhance your fence’s longevity. Plinth boards prevent the palings from coming into direct contact with the ground, reducing the risk of rot. Secure them to the rails with nails.
9. Measure and Cut Palings
Measure the distance between the posts to determine the width of each paling. Timber palings typically come in standard sizes, but you may need to trim them to fit precisely. Use a saw to make the necessary cuts.
10. Attach the Palings
Starting from the bottom, attach the timber palings vertically to the rails using nails. Ensure they are evenly spaced and level. The palings should overlap slightly to provide privacy and create a visually appealing pattern.
Perfecting the Details
As you approach the final stages of fence installation, paying attention to the finer details that will make your timber paling fence stand out is essential.
11. Check for Straightness
Use a string line throughout the installation to ensure that your fence stays straight and aligned with the marked boundary. Adjust the position of the posts if necessary.
12. Secure Palings with Three Nails
To ensure the stability of your fence, use three nails to attach each paling to the rails and posts. One nail at the top, one in the middle, and one at the bottom will provide a secure hold.
13. Trim Excess Paling Length
After attaching all the palings, trim any excess length at the top using a saw. This step ensures a neat and uniform appearance for your fence.
14. Install Post Caps
Install post caps to protect the top of your fence posts from the elements and enhance the overall look. These decorative additions serve a functional purpose and add a touch of elegance to your fence.
Frequently Asked Questions (FAQs)
Here are some common questions that DIY enthusiasts often have about timber paling fence installation:
1. How deep should I dig the post holes for my timber paling fence?
The depth of the post holes typically ranges from 600mm to 750mm, depending on the height and stability required. Deeper holes provide better support for taller fences.
2. Do I need to treat the timber palings for my fence?
Yes, it’s advisable to use treated pine timber palings as they resist rot and decay. This treatment ensures the longevity of your fence.
3. Can I build a timber paling fence on my own, or should I hire a professional fence installer?
Building a timber paling fence is a manageable DIY project if you have the necessary tools and skills. However, hiring a professional fence builder is wise if you’re unsure about your abilities or need a large fence.
4. How do I maintain my timber paling fence?
Regular maintenance involves inspecting for loose nails or palings and replacing them as needed. Additionally, consider reapplying a protective coating every few years to preserve the wood.
5. What is the standard height for a timber paling fence in Australia?
The typical height for a residential timber paling fence in Australia ranges from 1.5 meters to 1.8 meters. However, local regulations may vary, so you must check with your local council.
6. Can I install a timber paling fence on uneven terrain?
Yes, you can install a timber paling fence on uneven terrain. You may need to adjust the height of the fence posts or use plinth boards to accommodate variations in the ground level.
7. What are the advantages of using galvanized screws for a timber paling fence?
Galvanized screws are corrosion-resistant, which makes them an excellent choice for outdoor projects. They ensure that your fence remains sturdy and durable over time.
8. How do I ensure that my fence is level throughout the installation?
Use a spirit level to check the vertical alignment of the fence posts and the horizontal level of the rails and palings. Adjust as necessary to achieve a level fence.
9. Can I use timber from an old fence for my new timber paling fence?
Reusing timber from an old fence for your new fence can be environmentally friendly and cost-effective. However, make sure the old timber is in good condition and free from rot or decay.
10. How do I choose the right timber species for my paling fence?
Treated pine is a popular choice for timber paling fences in Australia due to its durability and resistance to decay. Selecting timber that can withstand the local climate and environmental conditions is essential.
Conclusion
Congratulations! You’ve successfully learned how to install a timber paling fence from start to finish. Building your fence can be a rewarding and cost-effective DIY project that enhances your property’s aesthetics and provides privacy and security. Remember to follow local regulations, use quality materials, and pay attention to details for a fence that will stand the test of time. Now, it’s time to roll up your sleeves, gather your tools, and start your timber paling fence project. Enjoy the process, and revel in the satisfaction of a job well done. Happy fencing!
Note: Always wear appropriate safety gear, such as gloves and protective eyewear, when working on any DIY project. Additionally, be sure to check and follow local regulations and safety guidelines for fence installation in your area.
Got something to say?